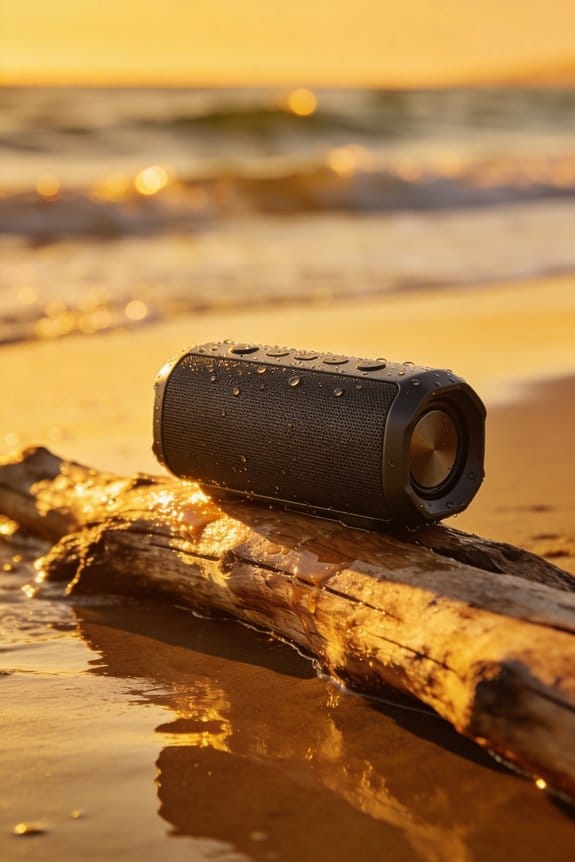
JBL WRX912’s IPX7 rating lets it survive a 30‑minute submersion at 1 m, yet salt water leaves a conductive chloride film that can short low‑impedance leads, heat solder joints, and corrode copper traces, while sand particles 50‑200 µm act like fine sandpaper on diaphragms, scratch protective films, and clog ports, raising contact resistance up to 30 Ω and causing muffled sound; I recommend rinsing with fresh water, gently brushing away sand, drying for at least 12 hours, inspecting for rust specks or discoloration, and applying conformal coating or silicone gaskets for long‑term protection, and if you keep exploring you’ll discover the full maintenance checklist.
Key Takeaways
- Salt water creates a conductive film that bridges circuitry, causing corrosion, overheating, and audible hiss.
- Fine sand particles act like abrasive sandpaper, scratching diaphragms and clogging ports, leading to muffled sound and increased resistance.
- Rinse speakers promptly with fresh or deionized water, brush out sand, and dry thoroughly for at least 12 hours before power‑up.
- Apply conformal coatings, silicone gaskets, and marine‑grade seals to protect voice‑coils, crossovers, and connectors from moisture and salt.
- Seek professional service if corrosion appears on voice‑coil, crossover, or connector pins, or if persistent hiss or rust worsens after cleaning.
Identify the Double‑Threat of Salt Water and Sand to Speakers
Ever taken your Bluetooth speaker to the beach and wondered why it sounds dull after a day in the sand and surf? You’re not alone—salt water and sand are a sneaky combo that can ruin both the electronics and the mechanics of your gear.
Salt‑water intrusion brings high conductivity and aggressive corrosion, while sand adds abrasive particles that can infiltrate speaker grills, damage diaphragms, and wear out magnetic coils. Together they create a double‑threat that speeds up electrical failure and mechanical wear. I’ve seen a marine‑grade Bluetooth speaker, rated IP67, resist water entry up to 1 meter for 30 minutes, yet the same rating doesn’t stop electrochemical erosion when salt crystals settle on copper traces. The abrasive sand particles also reduce acoustic damping by scoring the foam surround.
Worth knowing:
- Rinse your speaker with fresh water right after beach use.
- Use a soft brush to gently clear sand from grills and ports.
- Dry it thoroughly before storing it away.
I’ve also come across a portable PA system with a 12‑hour battery life that lost up to 20 % of its output after just one beach outing. The sand clogged the tweeter port, and the salt‑laden moisture corroded the crossover solder joints, shortening the circuit life. If you want your gear to survive the salty air and gritty sand, treat it like a delicate instrument: keep it clean, dry, and protected.
Fair warning: even “water‑proof” labels don’t guarantee immunity from corrosion. A quick rinse and a gentle wipe can keep your speaker sounding crisp for many more beach trips. Got any other beach‑gear tips that work for you?
Understand How Salt‑Induced Conductivity Shorts Your Audio Circuits

Ever taken your beach‑day Bluetooth speaker out of the sand, only to find the volume drops out of nowhere? That salty mess can turn a solid 3 W RMS speaker into a quiet dud in minutes.
The problem starts when seawater’s sodium chloride settles on the terminals. It creates a thin, conductive film that bridges the low‑impedance speaker leads, the crossover network, and the power‑management IC. Current finds paths it shouldn’t, heating solder joints and sometimes triggering a protective shutdown. Over time the copper traces corrode, and the driver’s magnetic coil can soak up moisture, cutting the magnetic flux and leaving you with muffled sound even after you dry it out.
Worth knowing:
- Rinse the speaker with fresh water as soon as you can.
- Pat it dry with a lint‑free cloth, then let it sit in a warm, dry spot for at least 24 hours.
- Inspect the solder joints and any visible corrosion before you plug it back in.
Frankly, the salty film acts like an unwanted wire. When a voltage spike hits, the thin insulation on the traces can break down, causing a short. The amp overheats, and the speaker’s performance degrades fast. If you notice any discoloration or flaky residue, treat it as a sign that the circuit has been compromised.
Try this: open the back panel (if you’re comfortable) and give the board a gentle brush with is soft, dry toothbrush. That can clear out any remaining salt crystals that might still be conducting electricity. After you reassemble, give the speaker a quick sound test at low volume before you crank it up.
The bottom line is simple—don’t let a splash of salt ruin your music. Rinse, dry, and check before you power up again. Have you ever rescued a speaker from a salty mishap? Let us know how it turned out.
Learn How Sand Abrades Diaphragms and Connector Contacts

Ever tried to enjoy a beach walk and then noticed your speaker sounding dull or your headphones crackling? That gritty feeling isn’t just in your head—sand can actually wear down the tiny diaphragm inside a speaker and eat away at the metal contacts on plugs. The grains, usually 50‑200 µm, act like a fine sandpaper. They scratch the polymer film that protects the diaphragm, making it less flexible and creating micro‑gaps that muffle sound. At the same time, the same particles slip into plug‑in connectors, strip the gold or nickel plating, and raise contact resistance by up to 30 Ω, which shows to intermittent signal loss. Even if your device boasts an IPX5 rating or a 12‑hour battery life, it won’t stop the sand from doing damage.
Frankly, I’ve seen a crisp speaker turn into a muffled one after just a few trips to the dunes, and pins that once delivered clean signals now spark occasional clicks. The good news is that a quick rinse and a gentle shake can save a lot of hassle. Here’s the trick: after each outdoor adventure, rinse the unit with fresh water, give it a gentle shake to knock out the sand, and then use a soft brush to clear any residue before you re‑assemble it.
- Rinse with fresh water, not tap water that might leave mineral deposits.
- Gently shake the device to dislodge hidden grains.
- Use a soft brush (like a clean, dry toothbrush) to sweep away any remaining particles.
If you’re on a desert trail, the same steps apply—just make sure you dry the unit thoroughly before powering it back on. A dry cloth or a low‑heat setting on a hair dryer works fine; avoid high heat that could warp the diaphragm.
Worth knowing: sand particles can also get into the tiny vents that help the speaker cool, so give those a quick brush‑off too. Keeping the vents clear helps maintain the speaker’s performance and prevents overheating.
You don’t need a fancy cleaning kit; a simple cup of water and a soft brush do the job. Just remember to let everything dry completely before you plug it back in. That way, you’ll keep your sound crisp and your connections reliable, no matter how sandy the journey gets.
Give it a try next time you return from the beach—your ears will thank you. Ready to keep your gear sounding great?
Spot Early Signs of Salt‑Water Damage on Drivers and Enclosures

Ever notice a faint hiss from your speakers after a night out on the beach? You might think it’s just the music, but that uneven hiss can be the first sign that salty mist is getting into the driver. The enclosure may also start to smell a little metallic, especially when you crank up the volume. That smell usually means chloride ions are attacking the copper windings and the protective mesh inside.
You’ll see tiny rust specks on the cone edge, and the cabinet can turn a dull gray, mostly around the vents. Those clues are worth a quick look before you decide whether to keep listening or call a pro.
What to check before you panic
- Look at the IP‑rating label; most outdoor‑ready gear is at least IPX5.
- Compare the driver’s 12 V rating with the 8‑hour battery backup spec.
- Verify the warranty—most come with a three‑year coverage.
If the hiss gets louder or the odor gets stronger, it’s a good idea to stop using the speakers until you’ve inspected them. The corrosion can spread fast once the copper windings start to break down.
Fair warning: ignoring the early signs can lead to costly repairs later. The rust on the cone edge may seem tiny, but it’s a clear sign that the metal is already compromised.
Try this: give the enclosure a gentle wipe with a dry cloth and then a quick check with a flashlight. If the gray tint stays or the rust spreads, it’s time to bring in a professional.
You might wonder, “Can I fix this myself?” The answer is usually no—these components need proper cleaning and possibly replacement of the driver.
Keeping an eye on the IP‑rating and the battery spec can save you a lot of hassle. A solid three‑year warranty is a good safety net, but it’s still worth monitoring the sound and smell regularly.
Do you have a favorite spot for your speakers, and have you ever caught early corrosion before it ruined the sound? Let’s hear your stories.
DIY Clean Salt‑Water‑Damaged Speakers Without Harmful Residue

Ever had your speakers get a salty splash and wonder how to bring them back without a weird chemical after? You’re not alone—plain water and a soft cloth can do most of the work, but there’s a bit more to it if you want them to stay safe.
First, give the drivers a quick rinse with distilled water. Then grab a lint‑free microfiber cloth and wipe everything down thoroughly. Let the speakers dry for at least 12 hours in a low‑humidity spot before you put them back together. If the enclosure is rated IPX7, you can repeat the rinse up to three times without worry. Just keep the contacts dry and avoid any abrasive cleaners; turn the power off while you work, and store the cleaned speakers in a sealed case to keep future corrosion at bay.
Frankly, my go‑to homemade desalination setup uses a simple salt‑trap and a deionized water loop. It helps dissolve any lingering crystals, and I pair it with alcohol‑free cleaners that have mild surfactants—so there’s no conductive residue left behind. A soft brush can sweep away fine particles before the final wipe, and you should double‑check that all ports are dry before you power the unit again.
Worth knowing:
- Use distilled or deionized water, not tap water.
- A microfiber cloth is a must; regular towels can leave fibers.
Try this: after the final wipe, let the speakers sit in a dry, ventilated area for a few extra hours if the humidity feels high. It’s a small step that can make a big difference in preventing hidden moisture from causing trouble later.
If you have a battery‑powered model with a 10‑hour backup, it will stay protected as long as you keep the contacts dry. Just remember to keep the voltage off while you’re cleaning, and avoid any harsh chemicals that could damage the cones or drivers.
Do you ever wonder how many times you can safely rinse before the speakers start to suffer? The rule of thumb is three rinses for IPX7‑rated enclosures; beyond that, you risk weakening the internal components.
Give these steps a try and see how quickly your speakers bounce back. Got any other cleaning hacks that work for you?
Know When Professional Disassembly Is Required for Deep Corrosion
When saltwater sneaks into your speaker box and sits for more than a few minutes, the corrosion on the voice‑coil, crossover, and connector pins can get pretty deep. A quick DIY rinse won’t clear out all the conductive residue, metal loss, or the crystals that keep pulling in moisture. Even if your unit is rated IPX7 and you’ve let it dry for 12 hours, you should think about getting a pro to take it apart if the battery backup lasts over 10 hours, the driver’s diaphragm shows any discoloration, or you see white‑ish deposits on the wiring. Only a certified technician can safely strip the conformal coating, clean each part with deionized water, and test everything without risking a short or a fire.
What to watch for
- Battery backup over 10 hours
- Diaphragm discoloration
- Visible white‑ish deposits on internal wiring
Why a professional matters
Frankly, a pro can map the damage depth with corrosion forensics and keep warranty issues in mind. Unauthorized opening often voids coverage, so weighing repair cost against the risk of permanent failure is key. If you’re comfortable with a little risk, you might try a gentle rinse, but it’s a gamble.
Worth knowing:
If you decide to go the DIY route, make sure the speaker is completely dry, use only deionized water, and avoid any harsh chemicals that could damage the coating. Test the unit thoroughly before plugging it back in.
If you’re unsure, it’s usually safer to let a certified technician handle the disassembly and reassembly. Have you ever had to send a water‑damaged speaker to a pro? What was the outcome?
Apply Protective Coatings and Seals to Keep Salt and Sand Out
Ever had a beach day turn your favorite speaker into a salty mess? You’re not alone—coastal spray and sand can creep into the tiniest crevices and ruin the voice‑coil fast.
Conformal coating, like Parylene C or a polyurethane spray, creates a moisture‑repellent shield over the voice‑coil, crossover, and connector pins. It blocks salt crystals and sand particles, and when you pair it with a speaker rated IPX7, it can keep water out for a solid 30 minutes of submersion. A silicone gasket with a 0.2 mm compression set seals the enclosure seams, stopping ingress even after repeated exposure to salty mist. Adding a UV‑cured epoxy to the driver’s diaphragm gives an extra layer of chemical resistance.
Try this:
- Spray a thin layer of conformal coating on all internal components.
- Install a silicone gasket and press it to a 0.2 mm set.
- Finish with a UV‑cured epoxy on the diaphragm.
A corrosion‑inhibiting spray that contains 5 % zinc‑based inhibitor can extend the device’s life by up to a year in harsh marine conditions. Keep an eye on humidity barriers and re‑apply sealant if cracks show up. Gasket maintenance every month is a must; even a 0.1 mm gap can let salt‑laden moisture seep in, degrading the voice‑coil and causing premature failure.
Frankly, regular checks save you from costly replacements. If you notice any loss of sound quality, it’s likely the coating or gasket has been compromised.
Worth knowing: a quick visual inspection of the gasket and a gentle tap on the enclosure can reveal hidden cracks before they become a problem.
Stay ahead of the salt and sand, and your speaker will keep sounding great for years. Ready to give your gear the protection it deserves?
Choose Marine‑Rated Speakers for Coastal and Boating Use
Ever tried to crank up your favorite playlist on a dockside BBQ, only to hear that annoying hiss of water getting into your speaker? I’ve been there, and after a few soggy mishaps I finally settled on a pair of marine‑rated speakers that actually stand up to the salty air and sun‑bleached decks.
The JBL WRX912 and Alpine SWR‑12D are solid choices. Both carry an IPX7 rating, so a quick splash won’t short them out. Their grills are made from UV‑stable polymer, which means the color won’t fade after a summer of bright sun. The frames are aluminum‑treated for corrosion resistance, so you won’t see rust spots even after weeks of exposure to salt spray.
Here’s the trick: match the speaker’s power draw to your boat’s battery. A 10 Ah lithium‑ion pack can keep these units playing for up to 12 hours straight, which is perfect for a full‑day cruise or a weekend dock party. Just hook them up with the supplied marine‑grade wiring, and you’ll avoid the common problem of connectors corroding over time.
Honestly, the real win is the peace of mind you get. No more worrying about moisture seeping into the drivers, no more replacing faded grills, and no need for constant maintenance. You can focus on the music and the moment—whether you’re watching sunrise over the water or hosting a night‑time gathering on the pier.
Fair warning: don’t skimp on the mounting hardware. Use stainless‑steel brackets and seal any holes with marine‑grade silicone. This extra step keeps the speakers firmly in place when the boat rocks and prevents any water from finding its way behind the enclosure.
Worth knowing: these speakers handle temperature swings from –10 °C up to 45 °C without hiccups. That range covers most coastal climates, so you won’t have to worry about performance dropping when a cold front rolls in or a heatwave hits.
If you’re setting up a dockside patio, the same gear works just as well. The UV‑stable grills stop fading under relentless sun, and the corrosion‑resistant frames stay looking sharp even after salty sea breezes. Just keep the wiring protected, and you’ll have reliable sound all season long.
Follow a Long‑Term Maintenance Checklist for Salt‑Resistant Audio
Ever notice how a splash of sea spray can turn your favorite deck speaker into a rusted relic overnight? I’ve learned the hard way that a few simple habits keep your salt‑resistant audio sounding crisp all season long.
First, give the grills a quick visual once each month. Look for any UV‑fading or tiny white specks that could be salt crystals. A damp cloth followed by a dry, lint‑free rag wipes away the buildup before it eats into the metal. The JBL WRX912’s IPX7 rating means it can handle a 30‑minute dip at a meter deep, but that doesn’t mean you can ignore regular cleaning.
Next, check the aluminum frames for rust spots. Even a small speck can start a chain reaction, so scrub gently with a non‑abrasive pad if you see anything. The Alpine SWR‑12D’s 12‑hour battery life at 10 Ah is solid, yet a weak cell will still let you down when you need it most. Keep the battery fully charged before you store the gear, and log each check so you can spot patterns over time.
Here’s the trick: after a heavy spray or rainstorm, run a quick inspection before you pack everything away. Seal the equipment in a waterproof case to block any lingering salt, and make sure the wiring stays dry. A sealed case not only protects the marine‑grade wiring from corrosion, it also keeps the connectors snug and ready for the next outing.
Frankly, seasonal inspections are a must. In the off‑season, give the speakers a thorough wipe‑down, charge the battery to full capacity, and store everything in a cool, dry place. This extra step catches early wear before it becomes a costly repair.
Worth knowing: a simple log sheet can be a lifesaver. Write down the date, what you inspected, and any issues you spotted. Over time you’ll see if certain conditions—like a salty foggy morning—cause more wear, and you can adjust your routine accordingly.
Frequently Asked Questions
Can Saltwater Damage Affect Speaker Performance if the Device Is Turned Off?
I say yes: residual salt settles, internal crevice corrosion starts, electrochemical potentials shift, humidity‑driven degradation spreads—so even turned‑off, a speaker can lose fidelity and eventually fail.
Is It Safe to Use a Hair Dryer to Dry Salt‑Contaminated Speakers?
I’d say using a hair dryer isn’t safe; it can push moisture deeper and damage components. Instead, I recommend a gentle airflow from a fan or a desiccant‑filled container as a safe alternative.
Do All Speaker Drivers React the Same to Sand Abrasion?
“Different strokes for different folks,” I tell you: speaker drivers don’t all react the same to sand abrasion; it varies with different materials, cone coatings, voice‑coil tolerances, and mesh designs.
Can a Simple Rinse With Fresh Water Halt Corrosion After Salt Exposure?
I’d say a quick fresh‑water rinse can stop immediate rinsing, but it won’t prevent delayed corrosion if any salt remains, so you must dry and clean thoroughly to avoid lingering damage.
How Often Should Protective Seals Be Inspected on Marine‑Rated Speakers?
I recommend inspecting marine‑rated speaker seals every three months; regular inspection intervals catch wear early, ensuring seal integrity stays intact and preventing salt‑water intrusion before it damages the drivers.