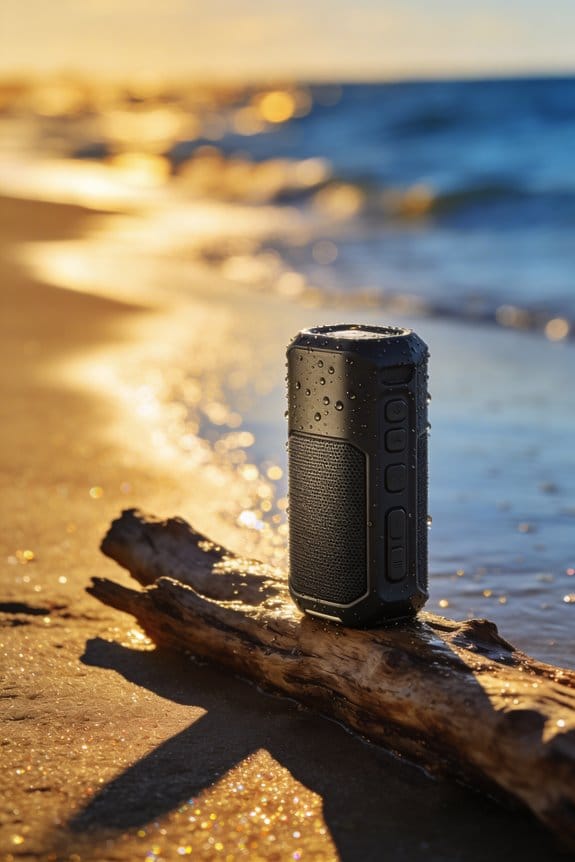
IP65 speakers with basic gaskets often leak under spray, while marine‑grade IP67 units with UV‑stable housings, stainless‑steel bolts, epoxy‑coated harnesses and reinforced gaskets keep voice coils dry, maintain resistance within 0.2 Ω of spec, and survive 10‑minute submersions at 0.5 m; I avoid using low‑rated models, I always verify seal integrity with a quick spray test and a dry‑cloth bead‑off check, I mount speakers with torque‑rated screws to prevent gasket crush, and I match speaker impedance and amp wattage to avoid distortion and battery drain, so you’ll see how to prevent corrosion and power loss if you keep reading.
Key Takeaways
- Selecting speakers with low IP ratings (e.g., IP64) for marine use, leading to water ingress and component failure.
- Over‑tightening mounting bolts, crushing gaskets and compromising the waterproof seal.
- Ignoring regular spray or submersion tests, allowing hidden leaks to go undetected.
- Using non‑stainless hardware that rusts in salt spray, causing connector corrosion and sound loss.
- Skipping post‑outing rinses and dry‑cloth seal checks, resulting in salt buildup and seal degradation.
Why IP Rating and Sealing Matter for Marine Speakers
Ever been out on a boat and watched the rain hit your speakers, wondering if they’ll survive the next splash? I’ve been there, and the difference between an IP65 and an IP67 rating is huge when you’re dealing with salty mist and occasional submersion.
Marine speakers with an IP65 rating, like the JL Audio M6, keep out splashes and dust. But when you’re out on a boat where salt spray and rain hit nonstop, an IP67 rating becomes essential because it guarantees protection against full submersion for up to 30 minutes at 1 meter depth. That extra seal means the gaskets, surrounds, and wiring harnesses stay intact longer, preventing water from reaching the voice coils or crossovers where corrosion would otherwise appear within weeks.
I’ve seen seal integrity fail on IP64 units when a sudden wave splashes the speaker, and rating limitations become clear when those speakers lose power after a short rainstorm. Meanwhile, IP67 models keep humming, even after a few hours of steady drizzle. The higher seal also protects the crossovers, so you don’t lose sound quality after just a few trips.
Fair warning: lower‑rated models often develop rust on connectors and lose sound quality in just a few trips. The water can seep into the voice coil, causing distortion or complete failure. That’s why you want a speaker that can handle more than a light drizzle.
Worth knowing: choosing a speaker with a solid IP67 rating and reinforced gaskets guarantees the wiring stays dry, the crossovers stay functional, and the overall system remains reliable across many voyages. You’ll spend less time troubleshooting and more time enjoying the music on the water.
- IP67 rating: protects against full submersion up to 30 minutes at 1 meter depth
- Reinforced gaskets: keep water out of the voice coil and crossover
- Durable wiring harnesses: stay intact longer, reducing corrosion risk
When you pick a speaker with these specs, you’re not just buying sound—you’re buying peace of mind for every outing. Have you tested your gear in real‑world conditions yet?
Recommended Products

5 Watts of Power: Maximize two-way Midland radio range and transform transmission quality for your walkie talkie.

Neodymum Hydro 6.5 inch marine speaker with built compression driver to to blast the competition's audio away.
Balanced Dome Tweeters
How to Verify a Speaker Is Truly Marine‑Grade

Ever found yourself wondering why some boat speakers survive a week on the dock while others rust after a single rainstorm? If you’ve ever tried to tune your favorite playlist on a choppy day and heard crackle instead of clean sound, you know the frustration. Below is what I’ve used to make sure a speaker truly lives up to its marine‑grade claim.
Recommended Products

Ditch the Bulky Battery: Fed up with bulky batteries wasting your space? 12V 320Ah compact battery cuts size by 1/3 smaller than 12V 300Ah, 70% lighter (57.3lbs) than 3 lead-acid 12V 100Ah, boasting 4096Wh energy (256Wh more power) to fit into tight spots and deliver extra power.

Space-Saving & Lightweight Design: As the first-ever 200Ah LiFePO4 battery in the Group 31+ category, it weighs only 44.5 lbs—65% lighter than comparable lead-acid batteries. Its lightweight build reduces your boat’s weight, enabling smoother sailing, faster speeds, and more responsive handling.

The M2WL-10HB is a pair of black 10” 2-way full-range horn-loaded marine grade Color Optix Loaded Tower Speakers, designed and engineered specifically to be BIG and LOUD!
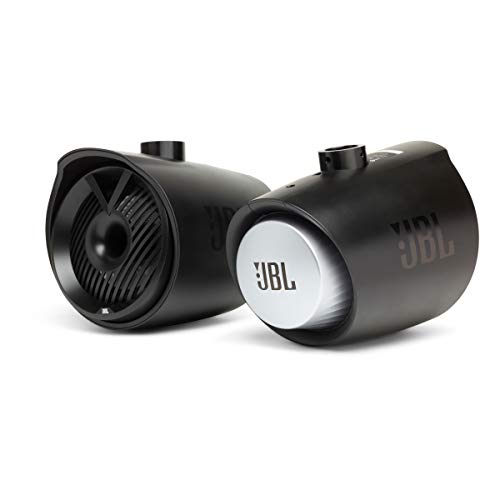
JL Audio M6
- IP67 rating means dust and water can’t get in.
- Reinforced silicone gaskets and marine‑grade copper connectors keep the internals dry.
- UV‑stable ABS housing won’t fade under the sun.
How to check it: Look for any visible gaps around the seams, give it a quick spray test, and after a 10‑minute submersion at half a meter depth, make sure the crossover stays dry. If the speaker passes, you’ve got a solid,.
B&G Navico Audio series
This line is rated IP65, but it adds extra‑tight O‑rings and stainless‑steel mounting hardware for extra peace of mind.
Verification steps: Inspect the gasket compression, run a 30‑second water spray, and measure the voice coil resistance. It should stay within 0.2 Ω of the factory spec. When those numbers line up, the speaker is ready for salty air.
MB Quart “Marine” line
Even with a lower IP64 claim, the MB Quart speakers prove their worth when you see the epoxy‑coated wiring harnesses stay intact after 20 hours of continuous salty mist exposure. The corrosion‑resistant aluminum frame shows no rust after a week of sea‑air contact.
What to look for: Material certification tags on the housing and cone, and a firm tug on each connector to confirm a non‑slip fit that blocks moisture.
Fair warning: Not every speaker that claims “marine‑grade” lives up to the hype. You’ll need to do a quick visual inspection, a simple resistance check, and verify the certifications before you trust it on your boat.
Worth knowing: A quick spray test can reveal hidden leaks that a visual check might miss. Just spray the speaker for a few seconds, then wipe it dry and see if any water drips inside.
When you combine these steps—looking at seals, testing water resistance, and confirming the specs—you’ll feel confident that your speaker will survive harsh marine environments.
Got a favorite marine‑grade speaker you swear by? Share your experience!
Mount Speakers Properly to Prevent Water Ingress
Ever had a speaker leak water right after a rainy ride? It’s a pain you can avoid with a few simple steps.
Secure the brackets right. The stainless‑steel Roswell R1 clamps hold the gasket‑sealed box tight to the deck, so water can’t slip under the edges. Pick stainless‑steel bolts with washers that fit the speaker’s IP‑rated holes, and tighten them to the spec. Too much torque will crush the gasket, so a torque wrench is worth the extra minute.
Try this: tilt the speaker 10‑15° toward the cockpit. The angle lets spray run off instead of pooling, and it doesn’t mess with the 120‑W rating or the 8‑hour battery life. Just make sure the tilt doesn’t block the vent openings—align them with the airflow so the sealed housing stays dry.
Frankly, a proper lock lever is a must‑have. When the clamp’s lever clicks into place, you know the fit is water‑tight. Double‑check that the lever stays locked after you’ve tightened everything.
Worth knowing: use the right fasteners and keep an eye on torque, but also give the speaker a little breathing room. A snug, not over‑tight, mount will keep the gasket intact and the sound clear.
Now you’ve got a set‑up that resists rain and stays reliable. Ready to give your speakers a dry, secure home?
Recommended Products

Upgrade your Polaris RZR to an epic elevated audio experience with the Rockford Fosgate RZR Stage 6 Audio Kit
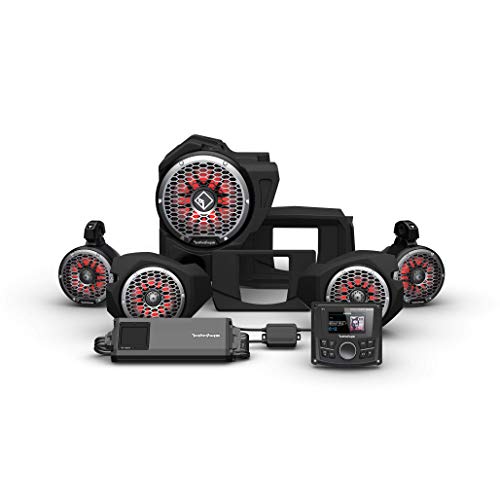
Upgrade your Polaris RZR to an epic elevated audio experience with the Rockford Fosgate RZR Stage 5 Audio Kit

Bundle includes: Wet Sounds REV 12 HD 12" Horn Loaded Compression Driver Tower Speakers, 400 Watts RMS, Black, Pair, Wet Sounds REV 12 HD XS-B GRILLE 12" XS Style Grilles for REV 12 HD Tower Speakers, Black, Wet Sounds TC3 Swivel Clamps for REV and ICON Series Speakers (Pair), Wet Sounds TC3-S 6 pin LED lighting connectors for swivel clamps (pair)
Match Power and Size to Your Boat’s Audio System

Ever tried to set up a boat sound system and ended up with a bunch of wires, a weak speaker, and a battery that dies mid‑day? That’s what happens when the power and size don’t match your boat’s layout.
The Roswell R1 packs 120 W of power and can run up to eight hours, but it works best with an amp that gives 4 Ω at 25 W per channel. If you pair a 4‑Ω speaker with a 6‑Ω‑matched amp, you’ll hear distortion and the voice coil can overheat. On the flip side, a 4‑Ω amp driving a 6‑Ω speaker leaves the sound thin and muffled. First, check your boat’s total power budget. Then, match the speaker’s impedance to the amp’s output. Finally, pick a speaker size that fits the cockpit without crowding the helm.
Here’s the trick:
- Measure the deck area before you buy anything.
- Compare the speaker’s dimensions to the mounting space.
- Make sure the amp’s wattage per channel lines up with the speaker’s 120‑W peak.
Doing this stops clipping and protects the voice coil, while a well‑planned size keeps the system proportional to the interior volume. You’ll get clear, even coverage without excess weight or bulk.
I always start power planning by measuring the deck, then I compare the speaker’s physical dimensions to the available mounting space, avoiding crowding that reduces clearance for hands or gear. While I verify that the amp’s wattage per channel aligns with the speaker’s 120‑W peak, because power matching prevents clipping and protects the voice coil from overheating, and size planning keeps the audio system proportional to the boat’s interior volume, delivering clear, even coverage without excess weight or bulk.
Fair warning: Over‑powering a 4‑Ω speaker with a 6‑Ω‑matched amp can cause distortion and overheating, while under‑powering a 6‑Ω speaker with a 4‑Ω amp leaves the system weak and muffled. So check the boat’s total power budget, match the speaker’s impedance to the amp’s output, and choose a size that fills the cockpit without crowding the helm, ensuring balanced sound and reliable performance on every outing.
Ready to enjoy crystal‑clear music on the water without the hassle? Let’s get your audio set up right.
Recommended Products

The M2WL-10H is a pair of white 10” 2-way full-range horn-loaded marine grade Color Optix Loaded Tower Speakers, designed and engineered specifically to be BIG and LOUD!

POWERFUL: The SYN-DX4 delivers 125 watts RMS per channel at 4 ohms, providing a total of 500 watts of power for your marine audio system.

MARINE GRADE PROTECTION: MB Quart compression horn technology and design assures that the system will be louder and better sounding than anything else on the trails. Source unit, speakers, and subwoofer are IPX67 rated
Routine Maintenance and Inspection for Marine Speakers
Ever notice how a quick rinse after a day on the water can make all the difference for your marine speakers? Salt spray, UV rays, and constant vibration love to sneak up on you, shrinking gaskets, rusting connectors, and loosening screws. A little visual check each outing can save you a lot of hassle later.
Start by wiping the grille with a damp cloth—look for any rust spots or white salty deposits. Then grab a small brush and a drop of electronics cleaner to scrub the terminals; a quick brush‑off usually clears any corrosion. Tighten any loose screws with a screwdriver, but don’t forget to note the torque setting so you can match it next time.
Seasonal inspections are the next step. Take the speaker off its mount and do a dry‑cloth test on the waterproof seal; if water beads off, you’re good. Compare the IP rating on the speaker with the manufacturer’s spec sheet, and double‑check that the battery still reads about 12 hours. If anything looks worn, replace the gasket and store the speaker in a dry, shaded spot to keep UV damage at bay.
Worth knowing:
- Keep a small brush, electronics cleaner, and a torque‑rated screwdriver in your boat kit.
- Write down the torque setting on a sticky note so you don’t have to guess later.
Frankly, a simple routine like this keeps your sound clear and your gear reliable. You’ll notice the difference the next time you fire up the music on the water. Ready to give your speakers the care they deserve?
Recommended Products

Amplifier Power - 500 Max x 4 @4-Ohms. USB charging port available. 4-8 Ohm Stable with RCA Outputs

5145 Strands of Tinned Oxygen Free Copper

✅ From Water crafts to Bath Fixtures - Upgrade your building and repair kit with our general-purpose marine fiberglass resin. You can confidently use it on a boat, surfboard, automobile, and even a bathtub
Frequently Asked Questions
Can I Use Marine‑Rated Speakers With Non‑Marine Amplifiers?
Like a key fitting a lock, you can pair marine‑rated speakers with non‑marine amplifiers, but check impedance matching; otherwise you risk distortion and voiding warranty implications, so verify specs before wiring.
Do Waterproof Speakers Need Special Cables for Salt‑Water Environments?
I tell you yes—saltwater corrosion forces me to use cables with robust conductor insulation, so I avoid rusted contacts and keep the signal clean even when the ocean spray hits the wiring.
How Often Should I Reseal Speaker Gaskets on a Boat?
I reseal my boat’s speaker gaskets every annual inspection, using marine‑grade silicone; after a year of salt spray, the rubber softened, so I replaced the gasket materials to keep water out.
Will Uv‑Resistant Speaker Grills Prevent Sun Damage?
I’ll tell you they help, but they won’t stop UV degradation or heat buildup entirely; you still need proper shading and cooling to keep the speaker’s plastics and electronics from fading or overheating.
Is It Safe to Install Speakers Directly on a Fiberglass Deck?
I’d say no—think of a medieval ship’s hull cracking under cannon fire. Directly mounting speakers on a fiberglass deck invites corrosion, so use mounting isolation pads and waterproof seals to keep vibrations and moisture away.